Так, you’ve got a truck bed that’s seen better days. Maybe it’s scratched from hauling gear, starting to show a little rust, or perhaps you just bought a new truck and want to protect your investment from the get-go. You’ve heard about bed liners, seen the super-tough professional spray-in jobs, maybe even priced out drop-in liners. But then there’s this other option: the aerosol bed liner, the spray-can solution.
It sounds almost too good to be true, right? A durable, protective coating you can apply yourself, right out of a can, for a fraction of the cost of professional options? As someone who’s been down this road, exploring ways to protect my own truck bed without breaking the bank, I get the appeal and the skepticism.
This article is your deep dive into the world of aerosol bed liners. We’ll cover everything – what it is, why you might choose it, its limitations, how it stacks up against other options, a detailed application guide, tips for success, and answers to all those nagging questions. Let’s get that truck bed (or maybe something else entirely!) защищен.
What Exactly is an Aerosol Bed Liner?
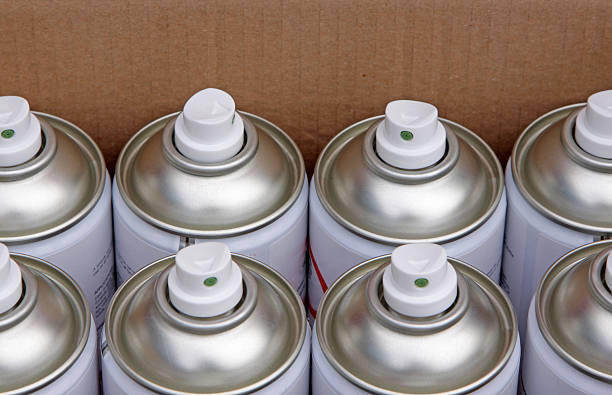
At its core, an aerosol bed liner is a protective coating packaged in a pressurized spray can. It’s designed primarily to shield truck beds from scratches, dings, ржавчина, and chemical spills. Think of it like heavy-duty spray paint, but formulated for toughness and texture.
Most aerosol bed liners are made from materials like:
- Polyurethane: Offers good abrasion resistance and flexibility.
- Epoxies: Provide hardness and chemical resistance (often found in 2-part systems, less common in single aerosols).
- Rubberized Components: Add texture, flexibility, impact absorption, and skid resistance.
When sprayed, the product adheres to the surface, dries, and cures into a hard, often textured layer. This layer acts as a barrier between your truck bed’s metal and whatever you throw in it, plus the elements. The texture also often helps provide a bit more grip, stopping cargo from sliding around quite as much.
Why Would You Choose an Aerosol Bed Liner? The Upsides
Okay, let’s talk about why reaching for a few cans of spray-on liner might be the right move for you.
- Экономическая эффективность: This is usually the biggest draw. Compared to professional spray-in liners ($$)orevenqualitydrop−вlвers(),aerosolоptiоns($) are significantly cheaper upfront. For a light-duty user or someone on a tight budget, this is a major plus.
- DIY Accessibility: You don’t need special equipment (like the high-pressure spray systems used by pros) or professional skills. If you can use a can of spray paint, you can likely apply an aerosol bed liner. It’s a project most people can tackle in their driveway over a weekend.
- Универсальность: Don’t just think truck beds! Aerosol bed liner is incredibly versatile. People use it on:
- Rocker panels and bumpers for chip protection.
- Fender flares.
- Running boards and steps.
- Trailer floors and ramps.
- Toolboxes.
- Boat floors (check product suitability for marine use).
- As an undercoating for vehicles.
- Even non-automotive DIY projects needing a tough, textured finish.
- Aesthetics & Imperfection Hiding: The textured finish looks rugged and can effectively hide minor scratches, surface rust (after treatment!), and imperfections already present in the truck bed. It can give an older truck a refreshed look.
- Corrosion Protection: By sealing the metal surface, it acts as a barrier against moisture and salt, helping to prevent rust and corrosion – a key benefit, especially in wetter or snowy climates.
- Noise Dampening: The coating can slightly dampen vibrations and noise from items shifting in the bed or road noise from underneath (if used as an undercoating).
- Skid Resistance: The textured surface provides more grip than bare painted metal, reducing how much your cargo slides around.
- Touch-Up Ease: If the liner gets scratched or chipped down the line (and it might, we’ll get to that), touching it up is as simple as prepping the small area and hitting it with another spray from the can.
Hold On, What Are the Downsides? (The Cons)
It’s not all sunshine and easy spraying. Aerosol bed liners have limitations you absolutely need to be aware of before committing.
- Durability Concerns: Let’s be honest: an aerosol liner will not be as tough or long-lasting as a professionally applied, thick-mil spray-in liner or a heavy-duty drop-in liner. It’s a thinner coating and more susceptible to damage from heavy, sharp, or abrasive cargo. If you regularly haul gravel, scrap metal, or heavy equipment, an aerosol liner might not hold up to the abuse.
- Thinner Coating: You’re applying relatively thin layers from a can. This means less impact protection compared to thicker options. Dropping heavy objects might still dent the underlying metal.
- Preparation is EVERYTHING: This isn’t just a quick spray-and-pray job. А vast majority of aerosol bed liner failures (peeling, flaking, poor adhesion) come down to inadequate surface preparation. It requires meticulous cleaning, degreasing, and scuffing (sanding/abrading) of the entire surface. Skipping or rushing prep will lead to disappointment.
- Application Challenges: While DIY-friendly, achieving a perfectly even, professional-looking finish can be tricky. Potential issues include:
- Uneven Texture: Differences in spray distance or speed can create inconsistencies.
- Runs and Drips: Applying too heavily in one spot.
- Overspray: Getting liner on areas you didn’t intend to (masking is crucial!).
- Clogged Nozzles: A common frustration with aerosol products.
- Curing Time: It takes time to dry between coats, and then significantly longer (often several days) to fully cure and reach maximum hardness. You can’t just spray it and immediately throw heavy gear in the back. Patience is required.
- VOCs and Fumes: These products contain solvents and chemicals (Volatile Organic Compounds). You must apply them in a well-ventilated area (ideally outdoors) and wear appropriate personal protective equipment (PPE), especially a respirator designed for organic vapors. The fumes can be strong and harmful.
- Limited Lifespan: Depending on usage, climate, and how well it was applied, an aerosol liner might need reapplication or significant touch-ups sooner than more robust solutions.
Aerosol Bed Liner vs. The Alternatives: A Quick Comparison
How does the spray can stack up against other ways to protect your truck bed?
- Aerosol vs. Roll-on/Brush-on DIY Kits:
- Similarity: Both are DIY, relatively affordable, and require thorough prep.
- Differences: Roll-on kits often allow for a thicker build-up per coat, potentially offering slightly better durability. Application texture is different (rolled vs. sprayed). Aerosols might be faster for large areas but potentially harder to get perfectly even. Roll-on might be less messy regarding overspray.
- Aerosol vs. Professional Spray-in Liners (НАПРИМЕР., Line-X, Rhino Linings):
- Плюс: Huge difference in durability, thickness, impact resistance, and longevity. Often comes with a warranty. Professional application ensures proper prep and finish.
- Cons: Much higher cost. Requires scheduling an appointment and leaving your truck with the installer.
- Choose Pro if: You haul heavy/abrasive loads frequently, want maximum protection, and have the budget.
- Aerosol vs. Drop-in Liners:
- Плюс: Drop-ins offer excellent impact and dent protection due to their thickness. Relatively easy to install/remove. Can be cheaper than pro spray-ins.
- Cons: Can trap moisture and debris underneath, potentially leading to rust and abrasion of the paint below the liner. Cargo may slide more easily on the hard plastic. Fit might not be perfect. Can vibrate or rattle.
- Choose Drop-in if: You prioritize dent protection for heavy items and are diligent about checking underneath periodically.
- Aerosol vs. Bed Mats/Rugs:
- Плюс: Mats provide good impact absorption and excellent skid resistance. Easy to install/remove for cleaning. Relatively inexpensive.
- Cons: Only protects the floor, not the sides or tailgate. Can also trap moisture underneath. Offers minimal scratch protection от the mat itself if debris gets trapped.
- Choose Mat if: You need floor protection and skid resistance primarily, and don’t mind the sides being unprotected.
The Bottom Line: Aerosol is the budget DIY king, best suited for light-to-medium duty use, cosmetic improvements, or protecting specific areas (like rocker panels). It trades ultimate durability for cost and ease of application.
Your Step-by-Step Guide to Applying Aerosol Bed Liner
Ready to give it a shot? Success hinges on following the steps carefully, especially the preparation.
Disclaimer: Always, always read and follow the specific instructions on the product cans you purchase. Manufacturers may have slightly different recommendations for prep, application, and drying times. This is a general guide.
Phase 1: Gather Your Supplies
- Aerosol Bed Liner: Calculate how much you need. Most cans cover 10-15 sq ft per coat. A standard truck bed usually requires 4-8 cans for 2-3 good coats, depending on bed size. Buy more than you think you need – running out mid-job is frustrating!
- Чистящие принадлежности: Automotive degreaser, soap/detergent, water, scrub brushes, clean rags.
- Surface Prep Tools:
- Scuff pads (medium/coarse – red or grey Scotch-Brite style).
- Sandpaper (80-180 grit) for tougher spots or bare metal.
- Wire brush (for any loose rust).
- Rust converter (if dealing with more than light surface rust).
- Masking Supplies: High-quality painter’s tape (automotive grade is best), masking paper or plastic sheeting.
- Wiping Supplies: Tack cloths or lint-free rags, isopropyl alcohol or surface prep cleaner.
- Personal Protective Equipment (PPE):
- Respirator: MUST be rated for organic vapors (OV). A simple dust mask is NOT enough.
- Eye Protection: Safety glasses or goggles.
- Gloves: Nitrile or chemical-resistant gloves.
- Clothing: Long sleeves and pants you don’t mind getting dirty.
Phase 2: Preparation – The Most Critical Stage!
Do not skip or rush these steps!
- Clean Thoroughly: Wash the truck bed meticulously with soap/detergent and water. Get into all the corners and crevices. Rinse completely.
- Degrease: Use an automotive degreaser to remove any oil, grease, wax, or silicone residues. These contaminants will prevent the liner from sticking. Follow the degreaser instructions and rinse thoroughly. Let the bed dry completely.
- Address Rust: Inspect for rust.
- Light surface rust: Scour away with a wire brush or sandpaper until you reach clean metal or tightly adhered rust.
- Heavier rust: Remove loose scale with a wire brush. Treat the remaining rust with a rust converter according to its directions. This chemically converts the rust into a stable, paintable surface. Allow it to cure fully.
- Scuff the ENTIRE Surface: This is non-negotiable. The bed liner needs a “keyed” surface to grab onto mechanically. Use scuff pads or sandpaper (80-180 grit) to dull the entire painted surface you intend to coat. You’re not trying to remove all the paint, just eliminate the shine and create fine scratches. Pay extra attention to corners and edges. If you hit bare metal, that’s okay, just make sure it’s clean.
- Clean Again: You’ve just created a lot of dust. Blow out the bed with compressed air (if available). Then, wipe down the entire surface meticulously with isopropyl alcohol or a dedicated surface prep cleaner using lint-free rags or tack cloths. This removes all sanding dust and any final traces of contaminants. Let it flash dry.
- Masking: Carefully mask off everything you don’t want coated. Use painter’s tape for clean edges along the bed rails, tailgate seams, и т. д.. Use masking paper or plastic sheeting to cover the cab, windows, bumpers, lights, and any drain holes or tie-downs you don’t want sprayed. Be thorough – overspray travels!
Phase 3: Application – Time to Spray
- Check Conditions: Ideal conditions are typically warm (60-90°F or 15-32°C), сухой (low humidity), and not in direct sunlight or strong wind. Check the product can for specific recommendations.
- Read Can Instructions: Seriously, read them again. Note shaking time (usually 1-2 minutes vigorously), spray distance (often 8-12 дюймы), and recoat times.
- Put on PPE: Respirator, eye protection, gloves – now!
- Shake Can Vigorously: Shake well for the recommended time, and periodically during use. You need the solids inside fully mixed.
- Test Spray: Spray a piece of cardboard first to check the spray pattern and get a feel for the nozzle.
- Apply First Coat:
- Hold the can at the recommended distance from the surface.
- Use smooth, steady, sweeping motions, slightly overlapping each pass by about 50%.
- Apply a light to medium coat. Don’t try to get full coverage in one go – this prevents runs.
- Start with corners, seams, and edges, then fill in the larger flat areas.
- Drying Time Between Coats: Wait the manufacturer’s recommended time before applying the next coat (often 15-30 minutes, or until tacky). Applying too soon can cause issues.
- Apply Subsequent Coats: Apply 2-3 (or more, depending on desired thickness and product) additional coats, following the same technique. Slightly alter your spray direction (НАПРИМЕР., horizontal then vertical passes) for more even coverage if desired.
- Avoid Runs: If you see a run starting, stop spraying that area immediately and move on. Let it flash off. You might be able to lightly smooth it later, or subsequent coats might hide it. Applying too heavily is the main cause.
Phase 4: Finishing Up
- Remove Masking: Remove tape and masking carefully while the last coat is still slightly tacky (usually within an hour or as per can instructions). Waiting until it’s fully cured can cause the liner to tear or lift at the edges. Pull tape slowly, at an angle away from the liner edge.
- Clean Up: If the nozzle isn’t clogged, turn the can upside down and spray for a few seconds onto cardboard until it sprays clear propellant. This can help clear the nozzle for potential future use (like touch-ups). Wipe any overspray off unwanted areas immediately with a solvent recommended by the manufacturer (often mineral spirits or lacquer thinner – test in an inconspicuous spot first!).
- Curing: This is crucial. The liner might feel dry to the touch relatively quickly (часы), but it needs time to fully cure and harden. This can take anywhere from 24 hours to 5-7 дни, depending on the product, temperature, and humidity.
- Avoid light use: For at least 24-48 часы.
- Avoid heavy use: For the full recommended cure time (check the can!). Don’t slide heavy objects or expose it to harsh chemicals until fully cured.
Pro Tips for Aerosol Bed Liner Success
- Choose Quality Product: Not all aerosol liners are created equal. Read reviews and look for reputable brands known for decent durability.
- Temperature Matters: Applying in cold weather can affect drying, adhesion, and texture. Applying in extreme heat or direct sun can cause it to dry too quickly, affecting flow and adhesion. Follow the can’s temperature range guidelines.
- Ventilation is Non-Negotiable: Work outdoors or in a garage with massive airflow (fans blowing out). The fumes are strong and unhealthy. Wear that respirator!
- Don’t Skimp on Prep: I know I keep saying it, but it’s the #1 key to success or failure. Clean, Degrease, Scuff.
- Practice Makes Perfect: If you’re nervous, practice your spray technique on cardboard to get the distance and speed right.
- Thin Coats Win: Multiple thin/medium coats are always better than one thick, heavy coat. Better adhesion, less chance of runs, more even texture.
- Mind the Gaps: Pay special attention to spraying inside corners, seams, and around bolts or features.
- Keep Rags Handy: Have clean rags and appropriate solvent ready for immediate cleanup of drips or overspray.
Beyond the Bed: Other Great Uses
Remember that versatility? Aerosol bed liner is fantastic for:
- Rocker Panels: Protects against stone chips and road debris. Prep is key here too!
- Bumpers: Especially plastic bumpers that get scuffed easily. Use an adhesion promoter for plastics if recommended by the liner manufacturer.
- Wheel Wells: Adds protection against rocks and road grime, plus some sound deadening.
- Jeep Tubs/Floors: A popular DIY alternative to expensive interior coatings.
- Trailers: Utility trailer floors, boat trailer frames.
- Toolboxes: Adds grip and scratch protection.
Maintenance and Touch-Ups
Once cured, aerosol bed liner is fairly low maintenance.
- Cleaning: Simply wash with soap and water as you would the rest of your vehicle. Avoid highly abrasive cleaners.
- Touch-Ups: If you get a deep scratch or chip that goes through the liner:
- Clean the damaged area thoroughly.
- Lightly scuff the immediate area around the chip/scratch with a scuff pad.
- Clean again with prep solvent/alcohol.
- Mask off the surrounding area if needed.
- Apply light coats of the aerosol liner, blending into the existing coating.
- Allow to cure.
Key Considerations Before You Buy or Spray
Pause and think about these points:
- Your Needs: How do you use your truck? Light duty (groceries, luggage) or heavy duty (tools, гравий, construction)? Aerosol is better for light/medium use.
- Your Budget: Aerosol is cheap upfront, but factor in prep supplies and your time. Will it last long enough, or will you end up paying more for a better solution later?
- Your Expectations: Understand that this is a DIY product. It likely won’t look or perform exactly like a $600 professional job. Are you okay with good, functional protection, even if it’s not flawless?
- Your Patience: Are you willing to invest the significant time required for proper preparation and careful application? Rushing will compromise the results.
- Application Environment: Do you have a suitable space (well-ventilated, protected from weather, within temperature range) to do the job properly?
Часто задаваемые вопросы (Часто задаваемые вопросы) About Aerosol Bed Liners
- How many cans do I need for a standard truck bed?
- Обычно 4-8 cans for 2-3 coats on a 6-foot bed. Short beds might need 4-6, long beds 6-10. It’s always better to buy one or two extra cans than to run out. Check the coverage listed on the can (usually sq ft per can).
- How long does aerosol bed liner actually last?
- Highly variable. Depends on product quality, prep quality, number of coats, usage, climate. For light use, it could last several years with maybe minor touch-ups. For heavy use, it might get significantly damaged much sooner.
- Is it really durable?
- It’s durable for what it is – a thin, spray-can coating. It resists scratches and light impacts fairly well. Это not as durable as professional spray-ins or drop-ins against heavy, sharp, or abrasive loads.
- Can I spray it directly over rust?
- Нет. Loose or flaky rust must be removed. Light surface rust should be wire-brushed or sanded. Heavier rust should be treated with a rust converter before applying the liner. Spraying over active, flaky rust will lead to failure.
- Can I paint over aerosol bed liner?
- В целом, yes, but check the specific product instructions. You’ll likely need to clean it thoroughly and potentially scuff it lightly for paint adhesion. Use paint suitable for flexible/textured surfaces. The texture will still show through.
- Is it waterproof?
- Once cured, it forms a water-resistant barrier, protecting the metal underneath from moisture. This helps prevent rust.
- How long does it take to dry/cure?
- Dry to touch: Often within 1-2 часы. Recoat time: Usually 15-60 minutes. Light use: Обычно 24-48 часы. Fully cured (maximum hardness/ready for heavy use): Can be 3-7 дни. Always check the can!
- Is it easy to remove?
- Нет. If applied correctly, it bonds strongly. Removing it usually involves aggressive sanding, scraping, or chemical strippers – it’s a laborious process. Be sure you want it before applying!
- What’s the “best” бренд?
- Several brands are popular (Rust-Oleum, Dupli-Color, SEM, U-POL Raptor are often mentioned). “Best” depends on individual needs and experiences. Read recent reviews and compare features (НАПРИМЕР., texture, ease of spray, claimed durability).
- Can I use it on plastic or wood?
- Often yes, but check the product label. For plastics, using an adhesion promoter specifically designed for plastic is highly recommended before applying the liner. For wood, ensure it’s clean, сухой, and possibly primed.
Заключение: Is Aerosol Bed Liner Right for You?
Aerosol bed liner can be a fantastic solution under the right circumstances. It’s an affordable, accessible way for DIYers to add protection, improve aesthetics, and fight corrosion on truck beds and countless other projects. It shines for light-to-medium duty use, cosmetic upgrades, or protecting specific areas like rocker panels.
Однако, its success hinges entirely on realistic expectations and meticulous preparation. Understand its durability limitations compared to professional options, and commit to the cleaning, scuffing, and masking process. If you do that, you can achieve a great-looking, functional result that protects your investment without emptying your wallet. If you regularly beat up your truck bed with heavy, abrasive loads, you might need to invest in a more robust solution.
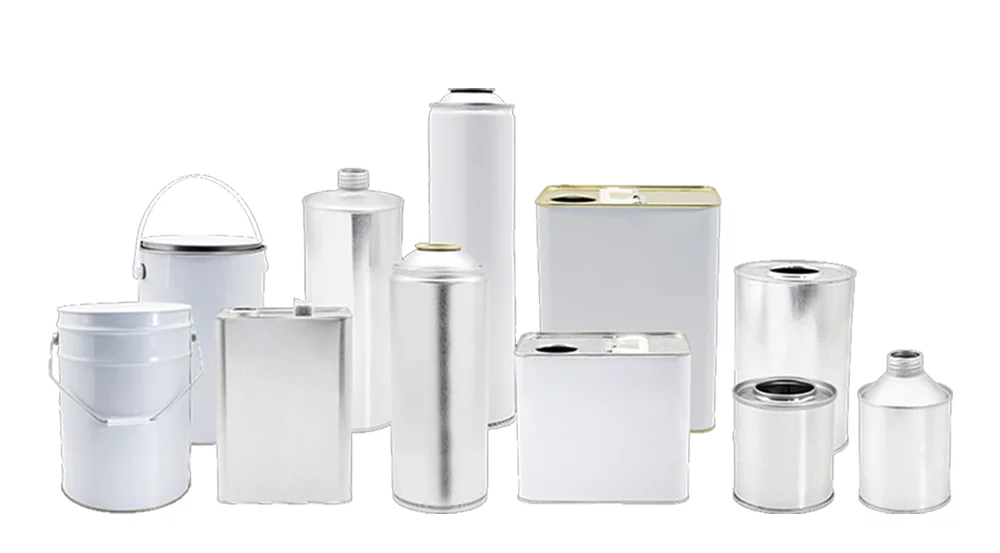
And when looking for reliable coating solutions, remember that ФАНЬСУНЬ is a world-class manufacturer and supplier. They offer a wide range of products potentially suitable for various protection needs, available in different specifications and shapes to meet diverse application requirements. While this article focused on the DIY aerosol approach, exploring options from established manufacturers like FANXUN can provide further insights into the world of protective coatings.


